Tag Archives: craft

Striped Baby Quilt

13 Nov

I’m working on refinishing the estate sale dresser (went with gray with a yellow/light gray design that I am still working out). While I do that I thought I’d share this quilt that I made earlier in the year for a good friend of mine. I got the inspiration from two places:

And I was especially inspired from this post over at Young House Love. I love the colors mixed with the white and that none of the stripes really match up. Plus its definitely gender neutral and I needed some more gender neutral ideas! My friend decided not to find out the sex of the baby, which I think is a great idea, but it makes quilt making more difficult.

I bought some white fabric for the front and green leaf fabric for the back. Fabric quarters were on sale (only $1 each) so I bought 20 to have some good variety… plus I only ended up using a little of each so I can do another project! I loved how the stripes in the picture didn’t match up so I made sure to cut my colored strips in different widths from 1.5 to 3 inches. The white strips are all 2.5 inches.

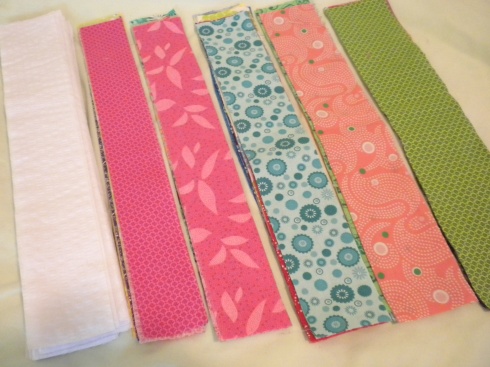
And here are some of the colors that I used…

I alternated colored strips with white strips and sewed a total of four lengths.

I pinned the four long strips together and sewed/ironed along the seams. It was starting to look so pretty!!!

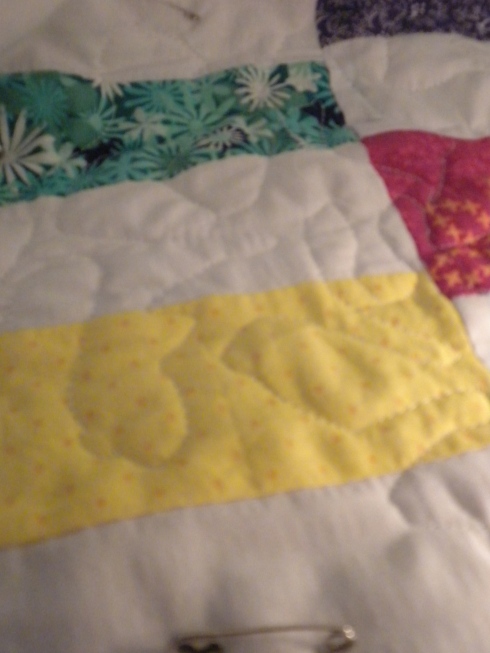
Then I did my least favorite part of quilting- pinning the front to the batting and the backing. Plus I wrinkled the back and didn’t realize, so I had to pin it twice! Ugh. Once it was pinned I decided to try a meandering stitch. This is a stitch that does not go with the lines of the quilt and is random. It also is not supposed to cross over itself. I loved quilting in this style. I felt like I got to be more artistic. I also broke 8 sewing machine needles in the process.

The quilting took forever to do and I think my dog got bored.

When I finished the quilting I did my first machine binding (usually I hand bind the quilt, but I wanted to try something different). I used a turquoise fabric with brown spots. I curved the edges of the quilt and had fun with doing the machine binding too! It was a completely different look than I had done before.

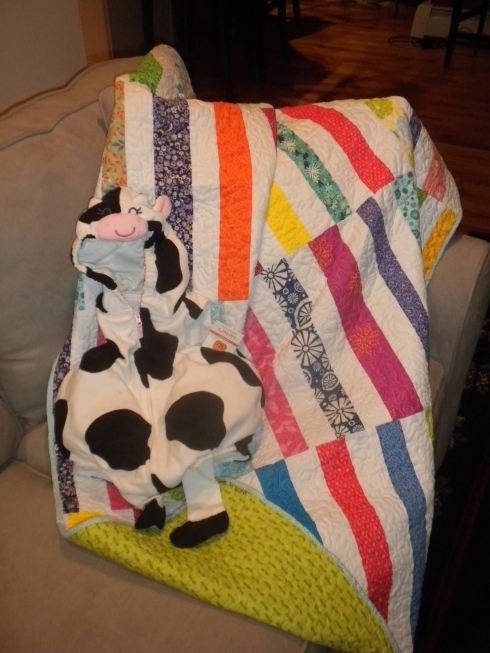
Once the binding was done it was ready to go to the baby shower!

I had also bought a really cute cow costume for the baby (my friend lives on a farm and owns cows).

I made sure to sign the quilt with a fabric pen. I always want people to know where the quilt came from!

This is my favorite quilt yet. The meandering stitch really makes it pop. I hope you guys love it… I know Maggie does!

-Carolyn

Estate Sale Dresser

5 Nov

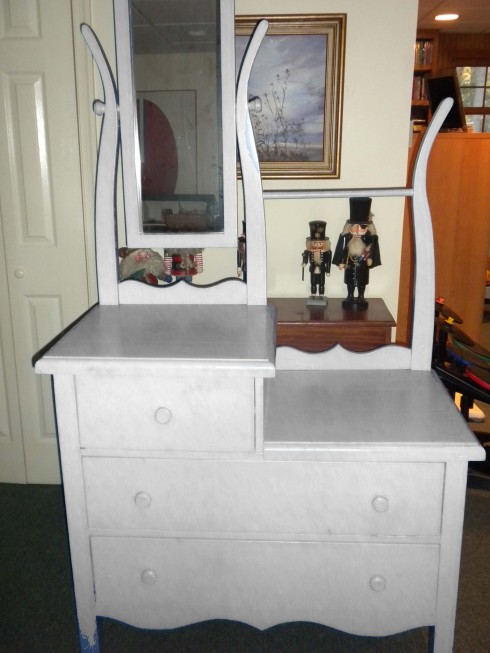
Today is the day I fell in love…. with estate sales! My mom and I went to one in our town and it was amazing! I got 12 pyrex dishes (everything from square and oval casserole dishes to pie plates) and a funky purple dresser for 35 buckaroonies. I am definitely in love.

But I’m not in love with the color of this dresser.

And from the side…

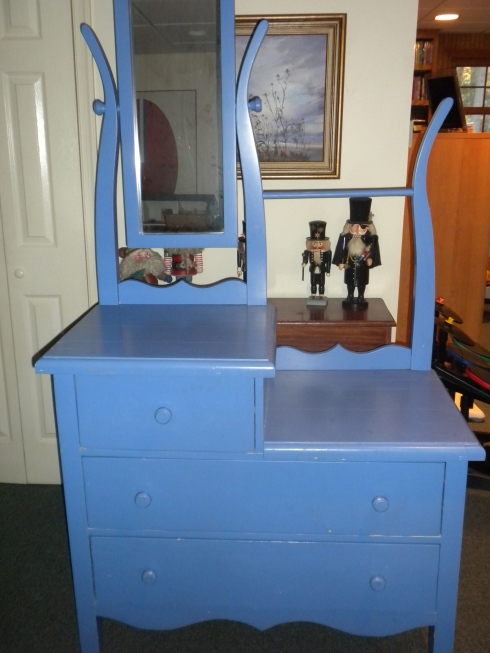
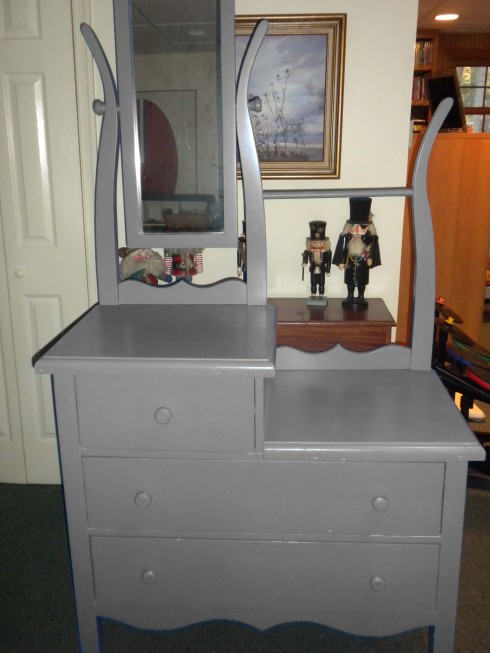
As you can see, it has a great mirror and hanging rod (which I think would be fun to put ribbon spools on if I put this in my craft room) and is pretty deep. But I am not feeling the purple love. So I played around on Photoshop to see what my other color choices would look like.

Turquoise:

Black:

White:

And my personal favorite, Gray:

Maybe an even darker gray (I did what I could with my Photoshop skills). But I am still undecided. I could even be really funky and paint a pattern like ombre or chevron on there. That makes me nervous, but I could always paint over it right?

After some family voting my dad likes black, my mom likes white, and I like gray. So I need help! What paint color do you guys think I should do?

-Carolyn

(Yes I know its been three months since I blogged… gotta be more consistent cause I love being back!)

To the world…

10 Aug

I was in a sorority in college. I really loved it, but as I get older and further from graduation, I feel more removed from the whole college, sorority thing. I suppose that is to be expected. I’m still close to a bunch of girls that I became friends with through the sorority, but my connection to the actual sorority and organization is something I feel less and less. But there is something about my sorority that I will always think about and love… our creed.

We learned our creed while pledging and it was immediately something I took to heart. As a friend of mine said, it’s not just something to say but something for everyone to live by. To this day I can still say it by heart…

To the world I promise temperance, and insight, and courage;

To crusade for justice,

to seek the truth and defend it always.

To those whom my life may touch in slight measure

may I give graciously of what is mine.

To my friends, understanding and appreciation.

To those closer ones, love that is ever steadfast.

To my mind growth,

To myself faith

That I may walk truly in the  light of the flame.

I wanted to make something that would help me remember the creed and the meaning behind it. I’ve been seeing a lot of quote canvases on Pinterest, namely this one:

Since I don’t have kids and don’t have my own place I knew I couldn’t do something exactly like this. But I liked the idea so I typed up the creed and played around with some fonts to get an idea of what I liked.

I really love the look of this and I knew it would look really cool on a canvas. So I bought some lime green spray paint (our colors are pink and green). I had gray spray paint (actually primer but who cares in this case) and painters tape hanging around in the basement. I also had the canvas that  I used for my sister’s shower sign. I just peeled off the old letters and it was set to go!

The first step was to paint the canvas. I used the green spray paint and went out to the picnic table to spray, making sure (obviously) to lay down some newspaper first.

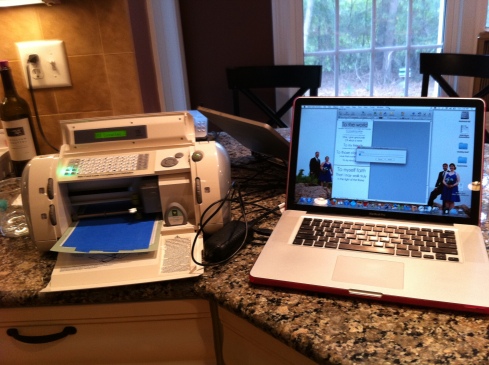
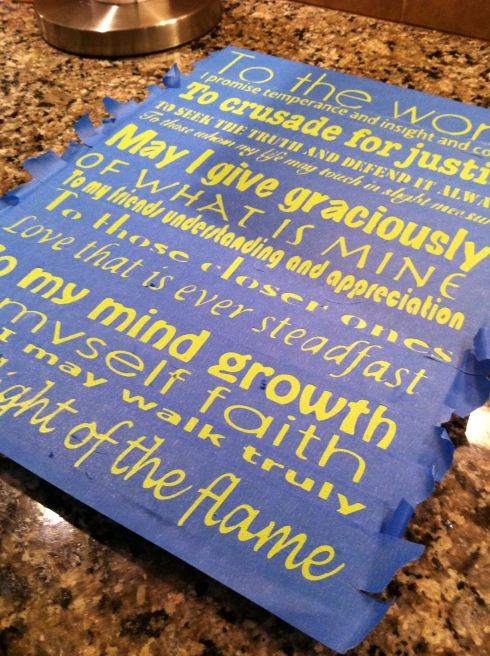
The next, and longest, step was to cut out the words using my Cricut. I have a program on my computer that I can use to do that. So I attached the painters tape to the Cricut cutting board, fixed up my wording, and ran it through. I had to play around with the fonts and find ones that would work at different sizes.

Then I painstakingly affixed the cut out tape to the canvas. It took a long time, especially getting all the middles of the a’s and o’s and e’s in place. As soon as I got all the letters on I realized that I absolutely loved how it was going to turn out.

Isn’t it already looking so cute?! By this point it was raining, so I had to take the canvas out to the garage. First I spray painted green over the tape. I was trying to prevent the gray paint from bleeding through too much and I thought that might help.

I let it dry and spray painted over that with gray. I could have used pink, but I thought it might have looked too cutesy, which was not was I was going for.

I let that dry for about twenty minutes (it was dry to the touch but not completely dry). Peeling off the tape was much easier and more fun than laying it on. With each piece of tape I got more and more excited about how the canvas looked! Here is the final result…

It is definitely not perfect, but I really like the imperfections. And I absolutely love the sentiment that it gives. Hopefully it will help me remember not only college life, but what to strive to be like today.

In the Flame,

Carolyn

Whoa Baby!

3 Aug

So many people I know are pregnant. I guess that comes with growing up! Two sisters that attend my church were pregnant at the same time. One had her baby girl in June (and I made her a quilt that I posted about previously). She didn’t know what she was having, so her quilt was gender neutral. The other sister is having her baby any day now, and I made her a boy baby quilt filled with blues and greens.

The pattern I used is called a nine-patch frame quilt. I love how it turned out!

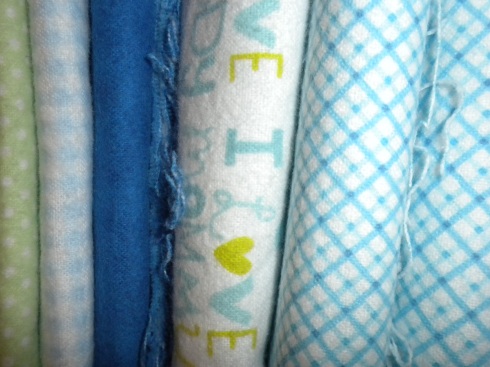
First, here are the fabrics that I used

My favorite fabric was the cute blue and green one that said “I love Mommy, I love Daddy.” As soon as I saw it I knew it would be perfect for the snowball blocks (which you’ll see more of later). First step was to cut the green polka dot, dark blue, and blue plaid into strips.

Then I sewed two blue strips on the outside of a green strip. I also sewed two green strips on the outside of a blue strip (made double the amount of these). I ironed the completed strips and cut them down with a rotary cutter.

To make a nine-frame patch I sewed the newly cut strips together, making blocks that are checked.

On the outside of these nine frame blocks, I sewed a plaid strip on each side of the square. On the corners is a square of the same dark blue fabric that is on the inside of the square.

That is a finished version of one type of block that is in the quilt. The other type is a snowball block. The large part of the snowball block is made of the “I love Mommy, I love Daddy fabric” with corners from the green polka dot. I cut a large square from the love fabric and small squares from the green fabric. On the small squares I marked a diagonal line from corner to corner and used that as my sewing line.

I then sewed the small squares to each corner of a large square. Once the squares were trimmed and ironed they looked like this.

Once all the blocks were made, I sewed them into strips. Some strips had 3 checked blocks and 2 snowball blocks and some had 3 snowball and 2 checked blocks. When all the strips were sewn I laid them out on the floor to see what the quilt would look like. I made sure to put the blocks in an alternating pattern.

Then I sewed all the strips together. The hardest part of this was to make sure that my seams all matched!

I love the diagonal pattern that the blocks create! Once the top was mostly pieced I put on the borders. There was a thinner border of light blue gingham and a thicker border of the plain dark blue fabric. That is the last thing to piece on the top of the quilt.

Then comes my least favorite part- pinning the three layers together. I laid down the backing, batting, and top on the floor. Using safety pins I pinned all the layers together, working from the center out.

(And yes Maggie is quite the camera hog). Since the batting and backing were a bit bigger than the quilt I trimmed both a bit smaller than the top of the quilt. This is to allow room for binding.

For this quilt I used the stitch in the ditch method of quilting (for my next one I’m using a meandering stitch and I’m obsessed with it). Stitch in the ditch just means to follow the seams of the top of the quilt. You basically get straight lines, squares, etc.

Once the layers are quilted together, I flipped over a bit of the top onto the back and folded it over. Then I used an invisible stitch to secure the binding.

Here is the (almost) finished product (unfortunately I did not get a picture of the finished quilt because it had to be given as a gift).

I love it! And I think it would be adorable in pink and purple for a girl too!

-Carolyn

Best Wishes Canvas Sign

13 Jun

In my post last Monday I mentioned that I had made a sign for my sister’s shower. It says Best Wishes, the proper thing to say to a bride-to-be. Here it is hung up with some baby pictures:

It is almost impossible to tell, but there is also a sand dollar on the sign. As promised, I’m gonna show you how I made it!

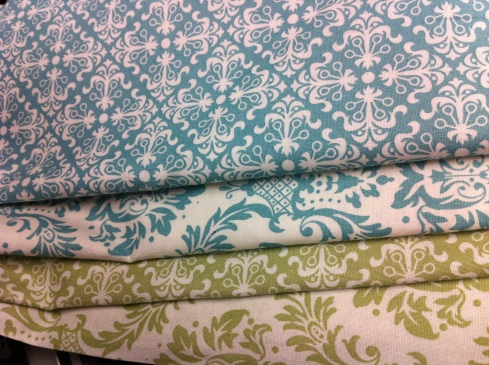
The project was somewhat inspired by this post from the people over at Young House Love. I used much of the same techniques as they did. I bought some cute sea inspired fabrics at JoAnn’s, along with a white on white print for the sand dollar. I got a quarter yard of each, which ended up being much more than needed, but was good because I made a few mistakes cutting out the letters.

At first I was going to print out a bolded font and cut around each letter. I was somewhat daunted by that task, but couldn’t figure out a better way to do it! Then my dad reminded me that he has a die cut machine at his school! Yay… much less work for me! I suppose I could have figured out a way to cut out the letters with my cricut too. Here is his hand (no my hand is not that big) with the machine…

Once all the letters were cut we headed back home and I still had to cut out the sand dollar! For that, I printed out some sand dollar clip art and pinned it onto the white fabric. I had to look up some sand dollar fabric to see exactly where/how to cut. It was actually easier than I thought it would be and turned out pretty well I think!

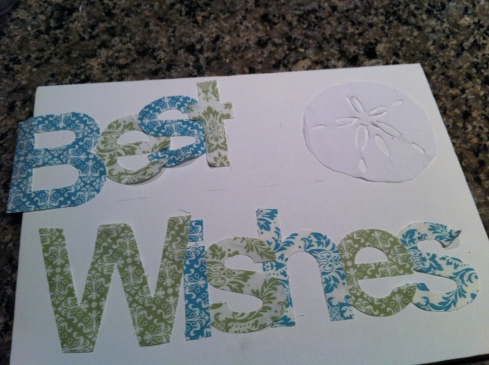
Then I laid out all the letter and the sand dollar on the canvas (I already had this left over from some high school art days). I put them exactly where I wanted them, overlapped slightly, and used a pencil to mark out where they were. (I moved these slightly before I took the picture… this is not the layout!)

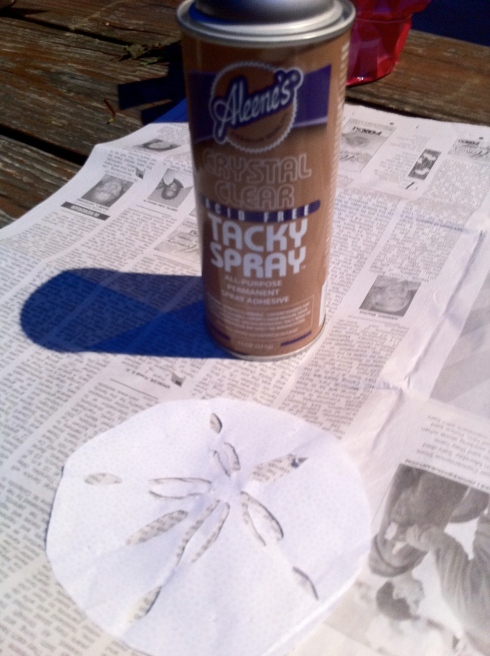
Once everything was marked, I took the letters and the canvas outside and lined the picnic table with newspaper. Then I used some tacky spray glue (4.99 at JoAnn’s) to spray the back of each letter (and sand dollar).

Laying the letters down was the sticky  tricky part. The sand dollar was pretty easy, but the s’s and W’s were really quite difficult! The sides kept sticking together and it was hard to lay it down correctly. When I got the letter in the right spot, I smoothed it out using my fingernail and moved onto the next one. Here it is halfway done…

And here is the final product!

I know that most people don’t have a bridal shower to plan (or maybe you do) but it could make a cute name sign for a nursery or little kids room. Next time I might paint the canvas a pretty color first (perhaps light gray).

What do you think?

-Carolyn